I've never been to Copenhagen, but as of recently I have been to the Netherlands. This video and the astonishment in the voices of the Americans really and truly echoes how I felt when I saw what cycling through a city CAN be. Hundreds, THOUSANDS of people getting through their day and the integration of cycling into the daily flow.
You can hear it in their voices, nothing but amazement and the astonishment that this is a real place where real people are just getting through their day. It's exactly how I felt in Europe.
Cycling Copenhagen, Through North American Eyes from Streetfilms on Vimeo.

Wednesday, May 29, 2013
Tuesday, May 28, 2013
Holy Rainy Bike Ride, Batman!
The weather's a funny thing - it was fantastic when I was broke, but Memorial Day weekend? It POURED the whole time. Not "Hahaha, look it's sprinkling!" More along the lines of "Pretty drenched pretty fast." However, Saturday was the Champion's League final, and I'll be damned if I wasn't going to go watch it. Since it was pretty rock-certain I was going to be drinking my choices of transport were cycling or public transport. However (and much to my dismay) I learned that Cap Metro Rail's Saturday service begins around roughly 4 p.m. So no train south on a rainy Saturday for Annie. I'd have to ride it.
I figured if I was going to bike all the way south, I might as well make a bit of a day out of it and find a new bike bell (my old one sang its last song). Along the way south I stopped at several shops, principally to dry off. The first was Ozone Bikes, a shop on Guadalupe north of campus. Their principal clientele during certain parts of the year are University Students but they're actually a FANTASTIC shop. They had a broader array of Mixtes and Stepthroughs than I'd seen at really any other shop in town. Multiple brands, sizes, materials, and styles in wide price range. They also had kickass locks, baskets, an array of panniers, and the friendliest staff you could ask for (whatup, guy from the TNSR!) But alas, they didn't have a bell that sang the song of my dreams, so onwards into the shower-like downpour I rode.
Next stop, Mellow Johnny's. My experiences at this shop have been mixed - sometimes they're snobs, sometimes they're awesome. Today I caught em on an awesome day, which may have had something to do with the rain. Here's a random trick for anyone about to try and sell a bike - put it up for sale when the weather is nice. It will attract more attention, and you'll make more money. Following this logic, crap weather often means bike shops are completely empty except for a few people in their to buy random stuff or just chat.
I rolled in looking like a drowned mouse but with a big smile on my face and did my preliminary sweep of the shop to see if there was anything I couldn't live without before getting to the bells. Now let me say - they have an AWESOME array of bells. But still, not quite what I was looking for. I did, however, learn about some modifications I can make to a couple lights I've been eyeing to add permanently affixed lights to the Surly. The tech even suggestion potential conversion to Dynamo lighting, which was a most excellent conversation (though I'm sticking with battery operated for this bike). But, no bell, so onwards!
Last bike shop of the day, Bicycle Sport Shop. I get most of the professional work on my bike done at the South Lamar location and know a lot of the employees socially, so I'm always happy to see what they've got. And they had it! A gigantic ding-dong bell! With an owl on it that I promptly named Hoot.
I do need to learn to be careful what I wish for because while the bell is insanely loud and awesome, it does definitely get in the way if I need to use the very front of the bars, a helpful hand position for climbing. But it definitely alerts people to my presence, so it gets it's job done with STYLE. I hung around for a while waiting on the rain to let up, but it never did, so I donned my soaked-through rain jacket and headed off to the bars to cheer on Bayern Munich (2013 CHAMPIONS, WHOOOO!)
Several beers later, it was time to head home. My "Get your ass to the train" alarm went off, and finally the sun came out. Happily inebriated I very slowly moseyed up 4th Street to the Cap Metro station, and sat my ass down on the train for the somewhat-drunken train ride home. No drunk driving for me, thanks!

Happy Memorial Day, folks!
I figured if I was going to bike all the way south, I might as well make a bit of a day out of it and find a new bike bell (my old one sang its last song). Along the way south I stopped at several shops, principally to dry off. The first was Ozone Bikes, a shop on Guadalupe north of campus. Their principal clientele during certain parts of the year are University Students but they're actually a FANTASTIC shop. They had a broader array of Mixtes and Stepthroughs than I'd seen at really any other shop in town. Multiple brands, sizes, materials, and styles in wide price range. They also had kickass locks, baskets, an array of panniers, and the friendliest staff you could ask for (whatup, guy from the TNSR!) But alas, they didn't have a bell that sang the song of my dreams, so onwards into the shower-like downpour I rode.
Next stop, Mellow Johnny's. My experiences at this shop have been mixed - sometimes they're snobs, sometimes they're awesome. Today I caught em on an awesome day, which may have had something to do with the rain. Here's a random trick for anyone about to try and sell a bike - put it up for sale when the weather is nice. It will attract more attention, and you'll make more money. Following this logic, crap weather often means bike shops are completely empty except for a few people in their to buy random stuff or just chat.
I rolled in looking like a drowned mouse but with a big smile on my face and did my preliminary sweep of the shop to see if there was anything I couldn't live without before getting to the bells. Now let me say - they have an AWESOME array of bells. But still, not quite what I was looking for. I did, however, learn about some modifications I can make to a couple lights I've been eyeing to add permanently affixed lights to the Surly. The tech even suggestion potential conversion to Dynamo lighting, which was a most excellent conversation (though I'm sticking with battery operated for this bike). But, no bell, so onwards!
Last bike shop of the day, Bicycle Sport Shop. I get most of the professional work on my bike done at the South Lamar location and know a lot of the employees socially, so I'm always happy to see what they've got. And they had it! A gigantic ding-dong bell! With an owl on it that I promptly named Hoot.
 |
| Ding Dong! |
Several beers later, it was time to head home. My "Get your ass to the train" alarm went off, and finally the sun came out. Happily inebriated I very slowly moseyed up 4th Street to the Cap Metro station, and sat my ass down on the train for the somewhat-drunken train ride home. No drunk driving for me, thanks!

Happy Memorial Day, folks!
Vehicular Cycling and Stockholm Syndrome
It's time for an opinion post, and this is one that may not be too popular. Outside the world of bike advocacy, we can generally agree that cars, pedestrians, and bikes do not mix well. At least the shouts of drivers and pedestrians alike would certainly suggest that this might be the case. However, the question that urban planners in the USA are dealing with is what to do with the bikes. Not as fast as cars, not as slow as pedestrians. Within the world of bike advocacy, that debate rages more ferociously than just about any other argument this side of helmets. I'm going to go ahead and come down on a side.
When I say "sides" there are two camps - "Vehicular" cyclists and those who prefer separated cycling infrastructure. Vehicular cycling is the group of people that advocate cycling like a car, an utter necessity given the current state of U.S. cycling infrastructure. It involves taking the lane, and utilizing all the lanes depending on current need - for instance, on my commute for about a mile I ride down the shoulder of a 3-lane, 65 mph dual carriageway and have to make a left. Vehicular cycling dictates crossing all three lanes into the lefthand turn lane, then making the left with the traffic signal, same as a car. It's exactly as terrifying as it sounds, and I am an extremely experienced street cyclist.
Those who advocate for separate bicycle infrastructure (if it's not already obvious, that's where I land) believe that this mix is the source of immense amounts of conflict. Primarily due to the difference in user vulnerability, isn't something that can be remedied with the usual platitudes about "educating motorists" or requiring cyclists to get a license (another suggestion bandied about by the frustrated). I'm of the belief that proper cycling infrastructure removes the conflict between drivers, cyclists, and pedestrians by providing for each equally and not pretending that we're going to educate ourselves into resolving the inherent differences in these three forms of getting from A to B.
Here's my theory, and it's not terribly flattering. I theorize that vehicular cyclists are essentially victims of a trafficky form of Stockholm Syndrome. We American cyclists fetishize our traffic skills and after dodging cars bask an adrenaline not dissimilar to the Running of the Bulls. For proof I will refer you to the film Premium Rush, an entire movie dedicating to crazy-ass vehicular cyclists. See also the popularity of brakesless fixed gears for transportation purposes, "Cat 6" racing, and commuters who draft. What I mean is that we've been forced to dance with the devil for so long that the notion we've had it wrong all along is met with nearly religious opposition.
Where this causes problems is that these conflicts within cycling advocacy means that there are people actively campaigning against separate bike infrastructure under the belief the best way to grow cycling in the U.S.A is to....change nothing. Which seems to be to not only be insanity but to completely ignore the sample size provided by multiple First World nations of millions of people who have any kind of decent modeshare. It's like denying climate change because you remember having hot summers as a kid. Why else would you ignore vast quantities of hard data and successful implementations around the world? In the end this causes mass confusion as urban planners try to accomodate the needs of cyclists and end with mixed messages. I think what we need to realize is that people's opinions don't necessarily reflect the best decisions on a city-wide scale. The mixed messages of cycling advocates received by city planners need to be ignored to a point in favor of hard data and facts.
I don't deny that everyone's heart is in the right place - the endgame is getting more people on bikes. But we need to admit that no one's grandmother is going to ride her bike like a car through traffic on Lamar, and put in bike infrastructure on which she could take your 8 year old to school.
Monday, May 27, 2013
Bike Registration. Apparently that's a thing.
I'm quite a fan of the City of Austin's Bike Program webpage. It includes helpful information about where they're putting in new bike infrastructure, what community meetings are happening, and so on. Until yesterday I had never noticed a small link offering the ability to register your bike's serial number and description with the Austin Police department in case of theft (link here). After completing the information on the website, I went looking for more information if this is a thing in other cities. And boy howdy, is it ever.
My search led me to the National Bike Registry, which works with law enforcement groups across the nation to assist with returning stolen bicycles to their owners. As we all know, bike theft is a real problem and if you're like me, I'm pretty attached to my wheels. Many of these bikes end up with law enforcement in another city and are never returned to their owner due to a lack of identification on the bike itself. Registration with the National Bike Registry makes your bike's serial number and your contact information available to any law enforcement group that bothers to notice their decal attached to the bike.
According to the NBR's website, they have a tremendously successful rate of return should your bike end up in a law enforcement holding. I'm not sure yet whether I'll register my bike, but at $10 for 10 years worth of registry it certainly isn't exhorbitant. The ideal of course is for the bike not to be stolen in the first place. But in an effort to turn hindsight into foresight, this is definitely worth some consideration.
Friday, May 24, 2013
Saddle Up
This week I've covered the other two contact points on the bike, the handlebars and the pedals. Now for the third, home sweet home - the saddle. There's not a whole lot to saddles, but there are a few things to consider. The first of which is that whatever came on your bike from the shop probably sucks unless they specifically mentioned it doesn't. You'll do what we all do - put up with it until you go on a ride long enough that you finally declare the stock saddle an ass-hatchet and in pain and frustration gingerly limp into a bike shop to get something right for you.
There are two metrics that pretty much determine saddle choice - sit bone width and the angle of the rider position. Your "sit bones" are exactly what they sound like but if you're not sure what yours are, they're the bones that hurt if you sit on a metal bleacher for too long. Sit on the ground cross-legged, sit up straight and rock from side to side. Those bones you're perched on are your sit bones. Many bike shops have a hilarious ass-o-meter that you can sit on to determine the width of your sit bones, a very useful metric while saddle shopping. It takes an impression of your butt bones, which is them measured - the whole process is very uninvasive. On a population wide level, women's sit bones are generally wider than men's.
The other metric, rider angle, is the same thing as "Rider position" that we discussed in the guide to choosing a commuter bike. An aggressive riding position essentially necessitates a narrower saddle to prevent your legs from hitting the sides as you pedal, sitting up necessitates a wider saddle so you have somewhere to put your ass. There's a huge range of saddles designed specifically for various rider positions and the packaging usually helpfully labeled by the type of bike for which they're intended (cruiser, hybrid, touring, road/racing, MTB, and so on). Compare the difference between these two:
The one on the bottom is intended for use with upright bikes, the one on the top is a racing-oriented roadbike saddle. Both are extremely comfortable, great saddles, they're just meant for completely different bikes.
There are two metrics that pretty much determine saddle choice - sit bone width and the angle of the rider position. Your "sit bones" are exactly what they sound like but if you're not sure what yours are, they're the bones that hurt if you sit on a metal bleacher for too long. Sit on the ground cross-legged, sit up straight and rock from side to side. Those bones you're perched on are your sit bones. Many bike shops have a hilarious ass-o-meter that you can sit on to determine the width of your sit bones, a very useful metric while saddle shopping. It takes an impression of your butt bones, which is them measured - the whole process is very uninvasive. On a population wide level, women's sit bones are generally wider than men's.
The other metric, rider angle, is the same thing as "Rider position" that we discussed in the guide to choosing a commuter bike. An aggressive riding position essentially necessitates a narrower saddle to prevent your legs from hitting the sides as you pedal, sitting up necessitates a wider saddle so you have somewhere to put your ass. There's a huge range of saddles designed specifically for various rider positions and the packaging usually helpfully labeled by the type of bike for which they're intended (cruiser, hybrid, touring, road/racing, MTB, and so on). Compare the difference between these two:
 |
| Terry FLX Carbon Saddle |
 |
| Terry Cite-X |
Once you've figured out what sort of saddle will work best for you in terms of style and width, now it's time to start shopping! Saddles come in a startling array of materials including foam, gel, and leather. I tend to prefer leather Brooks saddles, which break in to the user over time. They're legendary for their comfort and durability, plus I really like how they look. However I've extensively used a Terry Butterfly with the Cannondale and loved that saddle too because it fit properly. Much like the bike itself, 99% of loving a saddle is making sure it fits right.
 |
| The Brooks B-17 S |
Again, shop around. There's a ton of brands and every one of them has their own "special system" for determining fit. Any good bike shop will let you test ride a saddle to see if it works for you, on your bike. And believe me, the right saddle makes all the difference.
Thursday, May 23, 2013
Lock Down
Some time ago, I wrote a short post on how to lock up a bike to deter theft, but looking back on it I realized I never actually laid out the various security options available for purchase in the first place, and do's and don'ts. Since it's Bike Month, I'm assuming there's going to be a lot more of you out, meaning more bikes locked to poles. I want to help make sure your bike is still there when you get back.
The other thing to know is that people will steal anything not nailed down. Wheels. Saddles. The quick release skewers. It'll mess your day up to come out to a bike with a front wheel missing, and while you can't chain EVERYTHING down, you can certainly take some small logical steps to secure your stuff.
When choosing somewhere to lock up, make it stout, bolted down, and preferably a loop-shaped object in a well-lit area. There's a reason bike racks aren't just tall poles in back alleys. It seems ridiculous, but bikes are OFTEN stolen by simply lifting them over the object they're locked to. If you MUST lock up to a pole, it needs to either be incredibly tall, or have something on the top that you can't get the lock around (for instance, if you have a U-Lock, stop signs are pretty okay despite the fact they're not overly tall).
Types of Locks
Before you go to pick your lock out, here's the things you need to know. ALL bike locks are a deterrent more than anything else. Make your bike more of a pain in the ass to steal than the one next to it. The usual recommended amount to spend on locks is roughly 10% of the value of the bike, and I find this to be a really good rule of thumb.The other thing to know is that people will steal anything not nailed down. Wheels. Saddles. The quick release skewers. It'll mess your day up to come out to a bike with a front wheel missing, and while you can't chain EVERYTHING down, you can certainly take some small logical steps to secure your stuff.
U-Locks
For most of us in the US these are the standard in bike security. A U-Lock is a hardened metal shackle attached to a locking mechanism. Mine can be viewed on any picture of my bike locked up.


For most thieves to defeat these they attempt to do so by popping the lock and the shackle apart, or by using really big bolt cutters. The best way to avoid this is to have a smaller U-Lock - less space for someone trying to pop or cut it it. In my own case, I use an OnGuard Pit Bull in what at the time was called the "Medium" size - big enough to get around most poles, small enough to be a pain in the ass to potential thieves. The link above is the more recent version, but mine is holding up just fine so I haven't felt the need to upgrade.
Chains
These provide a similar level of security to U-Locks, particularly the insanely heavy duty ones. The most famous of which is the Kryptonite New York Lock, a 15 pound behemoth. These offer more flexibility than U-Locks in terms of items you can lock a bike to - odd shapes and U-Locks don't party well together. These are also good if you like to coil your lock around a piece of your bike for storage.
That being said, like the one above, these can be insanely heavy to lug around and consequently may be tempting to leave at home. Finding a balance between sufficient security and something so heavy you don't bother bringing it in the first place is a personal call. But a lock is only helpful when you use it, so make sure whatever you choose is something you can live with.
Cable Locks
These are the bastard child of all that is security when used as the only form of security on your bike. If you use a cable lock, your bike will eventually get stolen. If you use a cable lock in any kind of high-theft area, your bike will get stolen before you get back from the bar. I used one when I first started riding and didn't know any better - I consider myself VERY lucky to never have experienced theft.


So while they're awful as a primary lock, where these work extremely well is as a backup lock to a Chain or U-Lock. One of the big keys to theft deterrence is just making the valuable parts of the bike a huge pain in the ass to get at. So in my own case, as an addition to the U-Lock through the frame, I run an OnGuard Doberman through both wheels, the frame, and around whatever solid object I'm locking up to. The idea here is if a thief came prepared for one type of lock, there's a backup there they were hopefully unprepared for, and will move on to someone else.
Miscellaneous
Anywhere there's a market, there are people willing to sell you things. There are loose cables that can be looped around wheels and affixed to a U-Lock, lockable skewers you can put through your hubs, and rear-wheel locks which mount to the frame and simply immobilize the back wheel. Some are more effective than others - do your homework, read some reviews on Amazon before buying to see how well these smaller locks have held up in the real world.
Do's and Don'ts
Okay, so you went and bought some locks! Cool. Now that you've done that, we need to make sure you're using them to your best advantage.
When choosing somewhere to lock up, make it stout, bolted down, and preferably a loop-shaped object in a well-lit area. There's a reason bike racks aren't just tall poles in back alleys. It seems ridiculous, but bikes are OFTEN stolen by simply lifting them over the object they're locked to. If you MUST lock up to a pole, it needs to either be incredibly tall, or have something on the top that you can't get the lock around (for instance, if you have a U-Lock, stop signs are pretty okay despite the fact they're not overly tall).
Use the right level of security for where you are and what you're doing - and be realistic. If you live in a city with a lot of cyclists, a major metropolitan area, or any college campus, you need VERY stout locks. ALWAYS lock the frame to your stationary object. If you lock up nothing else, let it be the frame. If you lock up anywhere overnight, you need stout locks. These are high-theft situations. If you live in a town of 1000 people and are stopping by a coffee shop for a muffin, you can relax a little. Just trust me when I say overkill isn't a bad thing in this area - better to have too much and not need it, than to walk home.
Wednesday, May 22, 2013
Pedals - Bigger, Longer, and Unclipped
In my ongoing quest to inform you on every option available to the average commuter, we're on to our discussion of the next contact point most people change up on their bike - the pedals. Pedals (for me) have the potential to make or break my comfort on a ride. Clipless, platform, toe clips - the range of choices here can be overwhelming and is so strongly informed by personal preference it's hard to make a blanket recommendation. That said, here's what you'll need to know about pedals.
There are two basic things to start with - whether or not you prefer foot retention. Foot retention basically means binding your foot to the pedal, whether that be with a physical "Toe clip" or strap, or using a "Clipless" system pretty similar to the technology used in ski bindings. The advantage in using some form of foot retention is an increase in the amount of power coming from your legs actually making it into the drivetrain, including on the upward part of your pedal stroke. It's also a little easier to settle into a cadence, which is a steady and continual number of pedal strokes. I'll go into more detail below on the differences and advantages/disadvantages of the various types of foot retention.
There are two basic things to start with - whether or not you prefer foot retention. Foot retention basically means binding your foot to the pedal, whether that be with a physical "Toe clip" or strap, or using a "Clipless" system pretty similar to the technology used in ski bindings. The advantage in using some form of foot retention is an increase in the amount of power coming from your legs actually making it into the drivetrain, including on the upward part of your pedal stroke. It's also a little easier to settle into a cadence, which is a steady and continual number of pedal strokes. I'll go into more detail below on the differences and advantages/disadvantages of the various types of foot retention.
Platform
Platform pedals are the most basic, common type of pedal, but they come in a HUGE array of shapes and sizes. These are my preferred type of pedal on my Surly for two reasons. One, I own a huge array of shoes - waterproof boots, sandals, flip flops, tennis shoes, and fashion choices, and like to be able to ride in all of my shoes. Additionally, I personally have some joint-related issues and strapping my feet to the bike results in knee pain over time (yes, I had my clips properly adjusted on my cycling shoes when I used them). The reason for this is that clipless and toe clip pedals do their job extremely well and you can't move your feet around on the pedals, locking you into a single, identical pedal stroke. For my knees to be happy a little variety is good and so I am a sans-retention platform pedal user. However, if you take lots of really long rides (30+ miles) and don't suffer from the injuries I have, platform pedals do lose some efficiency.
There are a few main "styles" of platform pedal - rectangular is the most common type that comes on commuter bikes. I personally am quite fond of "BMX" shaped pedals with few sharp edges because I live out of sandals and shorts in the summer. Often, rectangular shaped pedals typically have sharp little nubbins designed to help hang onto your shoes, but I have destroyed shoes and cut my legs up too many times to count on these nubbins. But if you're one for long pants and consistently wear close-toed shoes, the rectangular pedals are extremely versatile and normally hang onto your shoes extremely well.
 |
| Rectangular "rat trap" style |
 |
| "BMX" style |
Toe Clips & Straps
These could by and large be considered a modification or variation on platform pedals - it's the same thing with some strappy bits attached to it. These originated Way Back In The Day with racing-oriented road cyclists to increase their efficiency. They offer a sort of middle place between retentionless platforms and dedicating all the way to clipless pedals. They CAN be ridden in multiple pairs of shoes but I really wouldn't recommend them with sandals as they can scratch the living hell out of the tops of your feet (ask how I know). Many road bikes (at least the ones that come with pedals) come with these attached as a cheap way to get you up and running.
There are some more modern variations such as Power Grips available which don't have an actual "toe clip" and are basically just straps that mount to the pedals.
 |
| Those guys are on the Tour de France, smoking cigarettes. However it's also a good picture of old-school toe clips. |
Clipless
Clipless are by and large the modern choice for sport cyclists and even many commuters. They offer extremely good efficiency, and are pretty easy to get in and out of once you've acquired the muscle memory. There are two basic types, "SPD"/"Mountain" and "3-hole"/"Road." They're primarily differentiated by how the clip itself mounts to the bottom of the shoes - Mountain style pedals have two holes in the bottom of the shoe for a small, low-profile clip, and 3-hole feature a much larger clip attached to shoes that usually have absolutely ZERO tread. 3-hole pedals should pretty much only be used with bikes primarily oriented around performance usage, rather than utility.
Mountain bike style clipless pedals offer a truly stunning range of style choices made by a variety of manufacturers. Some pedals even have a platform on one side and a clipless attachment on the other! Some can be clipped into from almost any angle by basically kicking your foot into the pedals - Crank Brothers pedals are specifically designed for this.
The other big advantage of mountain bike style pedals for the utility cyclist is that there are a huge variety of shoes made for clipless pedals designed to look normal. If you're a commuter and want clipless pedals, mountain is the way to go.
On a small aside, if you're like me and have some joint issues, two big metrics to pay attention to are "spring tension" and "float." Spring tension determines the amount of force necessary to pop out of the clip and on any pedal made by Shimano is adjustable. Start easy and as you gain more skill with clipless pedals increase the tension to wherever you're comfortable. Float is the amount of lateral movement allowed before popping out of the pedals - for me the only pedals that really worked for me were Crank Brothers as they had the amount of float necessary for me to avoid requiring reconstructive knee surgery after hours on the bike a week.
 |
| Shadow, featuring Crank Brothers Candies. |
Monday, May 20, 2013
New handlebar day!
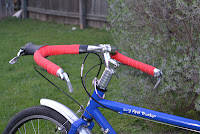
The last year I'd realized I actually didn't like my handlebars very much. They were close to what I'd been hoping for but I never actually achieved the position I'd originally been shooting for - upright enough to be comfy, while maintaining efficiency. I was efficient (ESPECIALLY downhill), but never upright as I'd have liked. So recently I changed out my handlebars for the third time, and spent longer than I'd care to admit installing them yesterday. It's now rocking the Nitto Albatross, a handlebar legendary for its comfort. Without further ado, the most recent incarnation of the Long Haul Trucker!

I also added the Brooks bar tape I received for Christmas and swapped the brake levers out (a necessity of these bars). I think it looks rather spiffy if I do say so myself!
To celebrate I took the bike out on a joyride into north-central Austin, something I enjoy doing when I'm not busy telling everyone else how they should ride bikes (answer: any damn way you want). As I headed south on one of my favorite streets, I noticed they'd upgraded the bike lanes and added some traffic calming. IN NORTH AUSTIN!

One of the more frustrating things about Austin is the amount of attention given to the area surrounding downtown - I'm a city of Austin resident but we don't get the cool upgrades they put in east of downtown, over the river, and on the south side. It's easy to feel ignored and left out. So little things like this warm my heart (though I'll faint of shock if I ever see this in the land north of 183).
In terms of how the new handlebars ride, let me just say they're awesome and make my bike everything I hoped it would be. Even though these bars are usually set up with grips, I used tape so I can utilize the whole handlebar. The top of the curves is actually pretty excellent for standing up on hills.
As I rode, I more or less ended up at my friends' house, and swung by the best gas station in the world to pick up a 6 pack before we had pizza and watched a movie together. In the words of Ice Cube, "Today was a good day."
The Texas Ironman
I love a good race. Be it a marathon, a bike race, or a triathlon, the atmosphere is infectious and almost everyone is always there for a good time. This past weekend I voyaged to Houston to see my brother run the Memorial Hermann Ironman Texas Triathlon. Two days later and I'm still hoarse from screaming.
Now, for the uninitiated, all triathlons are not created equal. You swim, then bike, then run, but there are different types classified by distance. This biggies are Sprint, Olympic, Half-Ironman, and Ironman. Here's how they break down:
Now, one of my favorite parts of any running-oriented race is that usually the competitors' names are on their bibs. So we the fans, in encouragement can be heard at a corner yelling our best encouragement to each person. "ENGAGE BEAST MODE KATHERINE!" "YOU LOOK GREAT JOE, YOU'RE ALMOST THERE!" You high five them, encourage people you see flagging - the energy of the crowd helps propel the event along.
For this race, the marathon portion was done in laps of 8-ish miles, and at particular corners you could see them as they came and went. I camped out at one of these spots for my brother and every time he came along me and the family were there hollering our finest encouragement. My favorite moment was on his last lap as he passed me he shouted "SEE YOU AT THE FINISH!" So much pride.
After long, long hours of watching the triathletes suffer I saw my brother come up the hill to the finish line. Smiling, high fiving, I saw him become an Ironman. And believe me when I say, that is a title anyone who can finish that madness deserves.
Now, for the uninitiated, all triathlons are not created equal. You swim, then bike, then run, but there are different types classified by distance. This biggies are Sprint, Olympic, Half-Ironman, and Ironman. Here's how they break down:
- Sprint - .5 mile swim, 12 mile bike, 5k run
- Olympic - 1.5 kilometres swim, 40 kilometres bike, 10 k run
- Half-Ironman - 1.2 miles swim, 56 miles ride, 13.1 mile run
- Ironman - 2.4 mile swim, 112 mile bike ride, and a full 26.2 mile marathon run
 |
| Spectator face! Also "about to take a nap" face. |
 |
| The Marathon was held along the canal in the backround. |
After long, long hours of watching the triathletes suffer I saw my brother come up the hill to the finish line. Smiling, high fiving, I saw him become an Ironman. And believe me when I say, that is a title anyone who can finish that madness deserves.
Friday, May 17, 2013
The Wheels on the Bike Go Round and Round
I've gotten a few requests to have a conversation about tires. I agree. It's time. The wheels of a bike are what carry you on down the road and there's a lot to 'em that has a really big influence on not only how strong they are, but how fast they roll and what you can carry. So, as usual, let's break it down.
There's two pieces at play here - the actual wheel and the tire. We'll start with the more expensive piece, the wheels.
On a bike wheel there are three pieces anyone cares about, and if you care to invest in custom-built wheels you can choose each individual component to your personal specifications. The wheels are the second most expensive piece of a bike after the frame, and your perception of how a bike rolls is heavily influenced by what's called "rotating weight". The idea here is that because the wheels are actually in motion, extra weight in them will slow you down more than an equivalent amount of extra weight in the frame (or drivetrain, or on you).
The hub at the center is a lot of what determines how easy your wheels spin. Cheaper wheels have cheaper hubs, which have cheaper bearings on the inside. You can do a lot to speed your ride up by using wheels with nice hubs. The hubs and the rim have to match on one very important factor - the spoke count. On road, mountain, commuter, and touring bikes there are vastly different preferences for an idea number of spokes to achieve the right balance of rotating weight and strength. For the purposes of the Bike Month series, we're sticking with commuters.
To take two of my favorite bikes, the Surly Long Haul Trucker versus it's close relative the Surly Cross Check, this is one of the most defining differences between the standard builds. The LHT is intended to carry heavy loads for long distances and comes specced with 36 spoke wheels. The Cross Check is lighter, sportier, and not intended to carry incredibly heavy loads for incredibly long distances and comes specced with 32 spoke wheels. They're lighter, so they're faster but there's a slight compromise in strength that comes into play depending on how much heavy-load carrying you intend to do with your bike. I don't tend to worry about weight too much, but I put insanely heavy stuff on my bike so I like the extra spokes.
The rims are the last component of the wheel and come in a couple options - "single" or "double" walled. Again, the double-walled rims are stronger but heavier and create greater rotating mass, so they're slower. It's physics, they just are. Rim choice is also dictated by the type of brakes installed on the bike - rim brakes need wheels intended for use as a braking surface. Disc, roller, and drum brakes don't!
When these items are all sensibly chosen you should end up with a wheel that's strong enough to hold up. Now, let's talk about size.
There are 4 wheel sizes generally in use today, only 2 of which you'll find on the majority of bikes. They are:
26 inch and 700c are pretty much the only two you'll see when looking around for a commuter. In my own case, I'm short as hell and as a result I chose a bike with 26 inch wheels. Additionally a smaller wheel is stronger than a 700c, helpful for my needs as a heavy-duty commuter who occasionally throws a 40 lb bag of grilling charcoal on the back. 700c is the faster choice and for anyone taller than I am is a really, really great wheel. They roll quick and the strength penalty for choosing a bigger wheel is so slight that for most folks it doesn't really matter. I've had bikes with both size and liked both. As always, my recommendation is to try some bikes in your size with each type and go from there.
There's two pieces at play here - the actual wheel and the tire. We'll start with the more expensive piece, the wheels.
Wheels
On a bike wheel there are three pieces anyone cares about, and if you care to invest in custom-built wheels you can choose each individual component to your personal specifications. The wheels are the second most expensive piece of a bike after the frame, and your perception of how a bike rolls is heavily influenced by what's called "rotating weight". The idea here is that because the wheels are actually in motion, extra weight in them will slow you down more than an equivalent amount of extra weight in the frame (or drivetrain, or on you).
The hub at the center is a lot of what determines how easy your wheels spin. Cheaper wheels have cheaper hubs, which have cheaper bearings on the inside. You can do a lot to speed your ride up by using wheels with nice hubs. The hubs and the rim have to match on one very important factor - the spoke count. On road, mountain, commuter, and touring bikes there are vastly different preferences for an idea number of spokes to achieve the right balance of rotating weight and strength. For the purposes of the Bike Month series, we're sticking with commuters.
To take two of my favorite bikes, the Surly Long Haul Trucker versus it's close relative the Surly Cross Check, this is one of the most defining differences between the standard builds. The LHT is intended to carry heavy loads for long distances and comes specced with 36 spoke wheels. The Cross Check is lighter, sportier, and not intended to carry incredibly heavy loads for incredibly long distances and comes specced with 32 spoke wheels. They're lighter, so they're faster but there's a slight compromise in strength that comes into play depending on how much heavy-load carrying you intend to do with your bike. I don't tend to worry about weight too much, but I put insanely heavy stuff on my bike so I like the extra spokes.
The rims are the last component of the wheel and come in a couple options - "single" or "double" walled. Again, the double-walled rims are stronger but heavier and create greater rotating mass, so they're slower. It's physics, they just are. Rim choice is also dictated by the type of brakes installed on the bike - rim brakes need wheels intended for use as a braking surface. Disc, roller, and drum brakes don't!
When these items are all sensibly chosen you should end up with a wheel that's strong enough to hold up. Now, let's talk about size.
There are 4 wheel sizes generally in use today, only 2 of which you'll find on the majority of bikes. They are:
- 26 inch - found on mountain bikes, some touring bikes, and some hybrids.
- 29 inch - found on awesome mountain bikes
- 700c - found on road bikes, the majority of touring bikes, cyclocross bikes, hybrids, and city bikes.
- 650b - this wheel size is pretty much exclusively used by bike nerds. Don't worry about it too much.
26 inch and 700c are pretty much the only two you'll see when looking around for a commuter. In my own case, I'm short as hell and as a result I chose a bike with 26 inch wheels. Additionally a smaller wheel is stronger than a 700c, helpful for my needs as a heavy-duty commuter who occasionally throws a 40 lb bag of grilling charcoal on the back. 700c is the faster choice and for anyone taller than I am is a really, really great wheel. They roll quick and the strength penalty for choosing a bigger wheel is so slight that for most folks it doesn't really matter. I've had bikes with both size and liked both. As always, my recommendation is to try some bikes in your size with each type and go from there.
Tires
So you've got a bike and it's got some wheels on it. Now we need some tires.
While I spent an insane amount of text talking about wheels up there, once you've picked out some wheels or bought a stock-specification bike, you're probably not going to swap the wheels out too much unless you have pretty specific needs (training wheels versus racing wheels). Tires though, are a consumable. They wear out from use, abuse. They get nails punched through them, slam over potholes, roll over gravel.....it goes on.
Tires are like handlebars - there's a few basic types but the permutations are nearly endless. For commuting, there are quite a few city-specific tires, but here's the criteria you're looking for.
Size
Whether you have an aluminum bike, a steel bike, a rigid or suspension fork, as a commuter the best thing you can do for yourself is get yourself some proper size tires. For 26" wheels I tend to prefer between 1.5"-1.75," and for 700c I really like 28-36 mm widths. For me personally, these tire sizes provide a sweet spot of narrow enough to get around quickly, but wide enough to provide some cushion and stability.
One limitation to "how big can you go" is a metric of a bike frame called "Clearance." This is basically how much room you have before things start to rub, and different styles of bike "make room" for different tire widths. In the case of my Surly LHT, the maximum tire width the bike can accept with fenders mounted is 2.1" wide. Check with whoever made your bike - this is a number they will have available.
Puncture Resistance
Welcome to the bike lane - the land that road cleaners forgot. As a commuter you will run over train tracks, nails, glass, huge bits of wire, and every other piece of godforsaken road debris that ever bounced out of the bed of a pickup truck and swept to the side. Puncture resistance is the ability of your tires to run over all of that nonsense and keep on trucking. For puncture resistance the usual recommendations are Schwalbe Marathons, Continental Gatorskins, and other tires with names that indicate their toughness. I personally use a Continental Touring Plus, a tire marketed as a direct competitor to the Schwalbes for slightly less money and so far I have run over all kinds of nonsense without issue. Tires that don't go flat are like air conditioning - you never think about it until something goes wrong.
Rolling Resistance
A tire with low rolling resistance glides over pavement seemingly effortlessly. However, a total lack of tread can lead to unreliability in anything but perfect conditions. So it's important to strike a good balance between easy-rolling and surefootedness. Rolling resistance is partially a function of tire size - the skinnier the tire, the faster it is.
In the end, tires are another balancing act. You need to balance weight, puncture resistance, and speed with your own personal needs.
As a final note - tire pressure. The skinnier the tire, the higher amount of pressure is necessary for it to support your weight. There's a recommended PSI range on the side of every tire sold in the USA. For best performance including puncture resistance, rolling resistance, and general lifespan keeping your tires in that range is a total necessity.
Happy bike month, folks! Wheel on.
Thursday, May 16, 2013
No handles barred!
As part of my Bike Month extravaganza, I'm going to be doing a series on the things every new bike commuter should know about bikes and things of that nature. Saddles, pedals, tires, clothing, and so on.
Once you have a bike, you quickly learn that the bits you genuinely care about are what we call the "contact points" - the parts you touch. You only really touch a bike at three points - hands, butt, feet. Today's topic is handlebars, and their friends, bar tape and grips.
When it comes to handlebars your choices are bordering on infinite. Every permutation of width, rise, angle, and any other dimension you can possibly imagine. There's absolutely no way for me to cover it all, so we're going to focus on the major types of bars usually used in commuting, how you can set them up, and then the things that you should consider when staring at a hundred different choices on the internet or in a shop.
Here in the US of A, to anyone who isn't at least somewhat into bicycles, these are the standard. You know 'em. These things:
Now, in my humble opinion that for any kind of road riding you may want to do, these are probably the worst bars in common usage. The biggest reason for my opinion on this is ergonomics. If you hold your hands at your sides, they naturally tend to fall parallel to your line of travel - in order to grip flat bars (which are also often called risers) you turn your hands 90 degrees inwards, and the rotation extends all the way through your shoulders. Additionally, there aren't any alternate places to grab the bars so you can move around, locking you into a single position that wasn't terribly ergonomic in the first place. Over time this position can cause neck pain and shoulder tension.
That all being said, the reason they're immensely popular among mountain bikers is LEVERAGE. You can really horse a bike around with flat bars - add to that the ability to chop them down quite narrow. These make them really popular with the bike messenger-inspired fixed gear set (it helps that these bikes are not typically ridden for huge amounts of time in one stretch). For short rides, they lend a whip-like, quick-moving action to the bike you can't achieve with any other bar type.
Drop bars, to newbies are intimidating looking. So many curves! What are the bull-horn bits for? Oh god, I have to lean forward to brake?
Relax, my friends. Drop bars are awesome. The basic idea behind drop bars is OPTIONS. You can hold your hands rotated on the flats, bend over and stretch out in the drops (that's the curved part), or relax with your hands on the ramps or hoods (the tops of the brake levers). For the most part, you'll hang out on the hoods - it's ergonomic, it's the natural place to be.
The limitations of these handlebars are largely positioning preferences, and where they land in relation to your saddle height-wise. If your have drops a couple inches lower than the saddle - congratulations, my friend, you are a performance cyclist. If you have them about level, you're still efficient, but you have several choices at any given time for hand placement depending on the current terrain. However, if you do prefer to sit up more, or like to cycle off-road these may not be the best handlebar for the task (cyclocrossers, however, would argue the point).


Once you have a bike, you quickly learn that the bits you genuinely care about are what we call the "contact points" - the parts you touch. You only really touch a bike at three points - hands, butt, feet. Today's topic is handlebars, and their friends, bar tape and grips.
When it comes to handlebars your choices are bordering on infinite. Every permutation of width, rise, angle, and any other dimension you can possibly imagine. There's absolutely no way for me to cover it all, so we're going to focus on the major types of bars usually used in commuting, how you can set them up, and then the things that you should consider when staring at a hundred different choices on the internet or in a shop.
Flat Bars
Here in the US of A, to anyone who isn't at least somewhat into bicycles, these are the standard. You know 'em. These things:
 |
| Yes, I dragged out all the flat bar bikes for this picture. |
Now, in my humble opinion that for any kind of road riding you may want to do, these are probably the worst bars in common usage. The biggest reason for my opinion on this is ergonomics. If you hold your hands at your sides, they naturally tend to fall parallel to your line of travel - in order to grip flat bars (which are also often called risers) you turn your hands 90 degrees inwards, and the rotation extends all the way through your shoulders. Additionally, there aren't any alternate places to grab the bars so you can move around, locking you into a single position that wasn't terribly ergonomic in the first place. Over time this position can cause neck pain and shoulder tension.
That all being said, the reason they're immensely popular among mountain bikers is LEVERAGE. You can really horse a bike around with flat bars - add to that the ability to chop them down quite narrow. These make them really popular with the bike messenger-inspired fixed gear set (it helps that these bikes are not typically ridden for huge amounts of time in one stretch). For short rides, they lend a whip-like, quick-moving action to the bike you can't achieve with any other bar type.
Drop Bars

Relax, my friends. Drop bars are awesome. The basic idea behind drop bars is OPTIONS. You can hold your hands rotated on the flats, bend over and stretch out in the drops (that's the curved part), or relax with your hands on the ramps or hoods (the tops of the brake levers). For the most part, you'll hang out on the hoods - it's ergonomic, it's the natural place to be.
The limitations of these handlebars are largely positioning preferences, and where they land in relation to your saddle height-wise. If your have drops a couple inches lower than the saddle - congratulations, my friend, you are a performance cyclist. If you have them about level, you're still efficient, but you have several choices at any given time for hand placement depending on the current terrain. However, if you do prefer to sit up more, or like to cycle off-road these may not be the best handlebar for the task (cyclocrossers, however, would argue the point).
Town Bars
The only reason I call them "Town Bars" is because I don't have a better name for them - this encompasses many, MANY permutations and styles. Moustache, Albatross/North Road, Porteur.....the list goes on. That being said, I would define a "Town Bar" as a handlebar with moderate drop all the way to significant rise where the portion intended to be gripped extends back towards the rider. Which is a really convoluted way of explaining this:


For medium-length rides (around 30 miles or less) and navigating traffic, this is my preference. One of the biggest reasons I quite like these bars is simple visibility - sitting up, it's easier for drivers to see you and identify you as a cyclist and a person. Similarly, when sitting up it's vastly easier to check over your shoulder before changing lanes, among other traffic-cycling necessities related to your ability to see what's going on.
However, depending on the handlebar in this category they can be limited to a single handlebar position in a similar manner to flat bars - there's only one place to grab on. The moustache bars on my Surly are somewhat of a hybrid between drop and flat bars, allowing a variety of hand positions, most of which are on a fairly level plane. The braking position, however, is extremely similar to the powerful braking position setup of flat bars. While this hybrid between leverage and comfort is possible, it required quite a bit of shopping around.
Now, I know in outlining these, I've missed a lot. I've missed butterfly bars, also known as trekking bars. I've ignored new ergonomic city offerings by American manufacturers getting their commuter game on. I haven't even touched bullhorns or flop-and-chop bullhorns made out of drop bars. I haven't gone into too much detail on the fact that in fact some flat bars have some rise and a bit of backwards tilt for ergonomic reasons. I realize that. But that said, as you look at the choices in front of you, you should look at the things they have in common, then decide which differences dictate your preference. For instance, a town bar shares many principles with a drop bar in terms of an ergonomic hand position - the disagreement is whether it's better to be forward or behind the head tube in terms of hand position. Some town bars are basically flat bars in terms of the actual hand position, they just sit up more. The only thing you can really do is try out different styles and continue making adjustments until you're happy.
However, handlebars aren't what most people actually touch. They're the structure beneath what you touch. When it comes to a tactile surface you've got two choices, bar tape or grips.
Bar Tape
Bar tape is the usual choice for any handlebar that takes a road-bike brake lever. That is, drop bars, trekking bars, and moustache bars for the most part. Bar tape comes in just about every material you could want - leather, fake leather, cork, fake cork, cotton cloth, and incredibly scientific synthetics with excellent cushion and minimal weight. Thick, cushiony, or low profile. All in any color you could care to coordinate with your bike.


That's all one bike. The beauty of bar tape is that you can change it! So go nuts. Express yourself.
Grips
Grips are the standard on any bike where your hand position is set. Flat bars and most town bars use grips and believe me - there ain't nothin' wrong with that. Similar to bar tape, this is like picking out a favorite pair of shoes. They're not expensive, so experiment! Maybe you like Ourys, or Ergons, or any other brand you like.
The only thing I can tell you is whatever came on your bike from the shop is probably crappy and worth changing out to something that makes your hands happy. A quick explanation. When you manufacture a bike, you're doing your level best to hit a price point because most people look at the price tag for a halfway decent bike and their hair falls out. To hit price points consumers will pay, you've got to go cheap on some things and for bikes, that's the contact points. So for the majority of even-vaguely serious cyclists, these are the first parts to get swapped for something a little more personalized.
So there you have it. Handlebars. As always, let me know if you have any corrections, comments, or queries in the comments!
Wednesday, May 15, 2013
Ever-Rising Interest - A Commuter Bike Buying Guide
The longer I live in Austin, the more cyclists I see on the road every year as the weather gets warm. Year on year, more people. It's awesome, even if it's more difficult to find good bike parking. So once again, as with every year I become the walking, talking "Guide on how to pick out an affordable commuter bike." It's a bit of a re-hash, but if you're new to this blog and don't feel like digging through the Posts of Summers Past, here's Annie's Guide to Basic Commuter Bikery.
First figure out your needs.
I mean in every dimension. How big is the city where you live? Does it have bike lanes, and how prevalent are they? What are the terrain and conditions (examples: hilly, flat, rains a lot, windy, freezes in winter, insanely hot in summer)? How far away is the average commute, and how far are the majority of your errands? Are you going to be taking recreational rides with this bike as well as utility cycling? How far/often?
This stuff matters. The REASON it matters is the type of bike that will work best for your needs changes based on all these factors and if you walk into a bike shop without a decent idea what you'll actually use the bike for, you're less likely to walk out with the right bike for you.
So here are the basic things to know about bikes before you buy them, and how those things relate to commuting!
There's three basic things to know about bike frames. What it's made out of, what the frame style is, and is it the right size for you. For utility cycling, there are really only two frame materials you should be looking at, steel or aluminum. They have some different properties that could throw your preference one way or another.
For my money, I'm buying steel every single time. It's sturdier, and comfier. It has a lot of ability to absorb vibration, reducing fatigue. It has a bit of flex to it, which is easier to handle over things like potholes. And if you load your bike up with groceries, steel has better strength to ensure the ride is comfortably stable on your way home.
That being said, aluminum has a lot going for it. For one thing, it's way lighter. However, it has none of the vibration absorbing properties of steel and many manufacturers compensate for this on commuter bikes by a adding steel, suspension, or carbon fiber fork. Additionally, aluminum is less durable and the frame will wear out more quickly than a steel frame (for an example, look at how many old-ass steel clunker bikes are still in service, and compare it to the relative age of the aluminum frames you see chained up).
Once you've figured out "Steel vs Aluminum," it's time to pick a frame style! In the US you pretty much get three choices, and from there it's all permutations. Diamond frame, Mixte, or Stepthrough.
A diamond frame is the classic bike that the majority of people ride. My Surly is a diamond frame bike, as are all bikes marketed directly at men. Many women's frames are also a diamond frame, with more slopey top tube (this slope, however, has basically nothing about it that makes it better for women). Here are some diamond frame bikes I've personally owned, all of which were used to commute at one time or another.


A mixte (French for "mixed," unsurprisingly) has a top tube....sort of. It joins near the headtube and runs in a straight line to the rear dropouts, creating a lower stepover frame while retaining many of the ride properties of a diamond frame bike. These can be quite sporty, while still extremely practical bikes. Some companies, including Linus, Public, and even Trek are once again offering this versatile frame style, making it way easier to get your hands on than even a few years ago.


Once you've figured out what you want in a material and frame style, figure out what size you need. A local bike shop should be able to help with this, and of course take lots of test rides to figure out what feels good for you.
Okay, so we've gotten this far. Awesome! Next up, the mechanicals.
The stuff that makes you stop and go. We'll start with gearing. You can have one gear, or many. If you're going with a singlespeed setup, you can stop here! I myself am a "more than 1 gear" kind of gal, as I encounter varied terrain everywhere I go and have a few knee issues, I'm not comfortable with a single speed bike. If it's flat everywhere you go, single speeds are great! But most of us are going to need some choices.
If you need more than one gear, you can choose between "Internally Geared Hubs" or "Derailleur Gearing." Internally geared hubs, in my opinion, are AWESOME. You will not find this attitude shared at any bike shop that primarily sells bikes for sporting purposes. Internally geared hubs tend to come in increments of 3-speed, 7-speed, and 8-speed. Internal hub gearing is basically what it sounds like - all the stuff that lets you shift is packed into the hub of the rear wheel. This keeps it all out of the weather so that rain, snow, road grime, and so on do not interfere with your shifting. Additionally, you can shift the bike while it's sitting still, a huge bonus in stop-and-go situations. However, if you want to take speedier long-distance recreational rides this setup can be heavier. Additionally, hub gearing is not DIY-friendly for the average at-home mechanic and does need to be professionally serviced if something goes awry. The Electra Townie pictured above has 8-speed internally geared hubs.


First figure out your needs.
I mean in every dimension. How big is the city where you live? Does it have bike lanes, and how prevalent are they? What are the terrain and conditions (examples: hilly, flat, rains a lot, windy, freezes in winter, insanely hot in summer)? How far away is the average commute, and how far are the majority of your errands? Are you going to be taking recreational rides with this bike as well as utility cycling? How far/often?
This stuff matters. The REASON it matters is the type of bike that will work best for your needs changes based on all these factors and if you walk into a bike shop without a decent idea what you'll actually use the bike for, you're less likely to walk out with the right bike for you.
So here are the basic things to know about bikes before you buy them, and how those things relate to commuting!
Frame
There's three basic things to know about bike frames. What it's made out of, what the frame style is, and is it the right size for you. For utility cycling, there are really only two frame materials you should be looking at, steel or aluminum. They have some different properties that could throw your preference one way or another.
For my money, I'm buying steel every single time. It's sturdier, and comfier. It has a lot of ability to absorb vibration, reducing fatigue. It has a bit of flex to it, which is easier to handle over things like potholes. And if you load your bike up with groceries, steel has better strength to ensure the ride is comfortably stable on your way home.
That being said, aluminum has a lot going for it. For one thing, it's way lighter. However, it has none of the vibration absorbing properties of steel and many manufacturers compensate for this on commuter bikes by a adding steel, suspension, or carbon fiber fork. Additionally, aluminum is less durable and the frame will wear out more quickly than a steel frame (for an example, look at how many old-ass steel clunker bikes are still in service, and compare it to the relative age of the aluminum frames you see chained up).
Once you've figured out "Steel vs Aluminum," it's time to pick a frame style! In the US you pretty much get three choices, and from there it's all permutations. Diamond frame, Mixte, or Stepthrough.
A diamond frame is the classic bike that the majority of people ride. My Surly is a diamond frame bike, as are all bikes marketed directly at men. Many women's frames are also a diamond frame, with more slopey top tube (this slope, however, has basically nothing about it that makes it better for women). Here are some diamond frame bikes I've personally owned, all of which were used to commute at one time or another.


A mixte (French for "mixed," unsurprisingly) has a top tube....sort of. It joins near the headtube and runs in a straight line to the rear dropouts, creating a lower stepover frame while retaining many of the ride properties of a diamond frame bike. These can be quite sporty, while still extremely practical bikes. Some companies, including Linus, Public, and even Trek are once again offering this versatile frame style, making it way easier to get your hands on than even a few years ago.
A step-through frame encompasses quite a few separate frame styles, but we won't get into that here. All it means is that the frame's top tube has been shaped to provide the shortest height to step over to mount the bike. These are incredibly useful if you often have a lot of stuff on the rear rack (example: a kid). If you have hip or back problems, these easy-mount bikes may be for you as well. They have a very elegant look to them, and are also more compatible with somewhat more formal clothing since you don't have to hike a leg up to get on. The Electra Townie and Kona AfricaBike I've reviewed are both examples of step-through frames.

Okay, so we've gotten this far. Awesome! Next up, the mechanicals.
Gearing and Brakes
Gearing
The stuff that makes you stop and go. We'll start with gearing. You can have one gear, or many. If you're going with a singlespeed setup, you can stop here! I myself am a "more than 1 gear" kind of gal, as I encounter varied terrain everywhere I go and have a few knee issues, I'm not comfortable with a single speed bike. If it's flat everywhere you go, single speeds are great! But most of us are going to need some choices.
If you need more than one gear, you can choose between "Internally Geared Hubs" or "Derailleur Gearing." Internally geared hubs, in my opinion, are AWESOME. You will not find this attitude shared at any bike shop that primarily sells bikes for sporting purposes. Internally geared hubs tend to come in increments of 3-speed, 7-speed, and 8-speed. Internal hub gearing is basically what it sounds like - all the stuff that lets you shift is packed into the hub of the rear wheel. This keeps it all out of the weather so that rain, snow, road grime, and so on do not interfere with your shifting. Additionally, you can shift the bike while it's sitting still, a huge bonus in stop-and-go situations. However, if you want to take speedier long-distance recreational rides this setup can be heavier. Additionally, hub gearing is not DIY-friendly for the average at-home mechanic and does need to be professionally serviced if something goes awry. The Electra Townie pictured above has 8-speed internally geared hubs.

The other choice is derailleur gearing, far and away the most common type of gearing system in the USA. ALL of my bikes have derailleur gearing - that's just how they came. This is the choice of all sport cyclists, and offers gearing ranges far above what is possible with internally hubbed gears, excellent if you have extremely varied terrain, or just like having a lot of choices. My Surly has 27 gears - 3 chainrings in the front and 9 cogs in the back.
However, because all the working parts are exposed, derailleur gearing gets dirty QUICKLY. Every puddle splash, pollution-filled wind gust, and dusty bike trail are going to leave sediment on your drivetrain. Additionally, derailleur gearing does not appreciate being kept out in the weather. As such the drivetrain does need to be cleaned regularly to be kept in proper working order. And believe me, the cleaning is a messy job if not regularly kept up with.
Brakes
For brakes, you pretty much have the choice between hand brakes and coaster brakes (the kind you pedal backwards to stop).
Coaster brakes are convenient for hands-free stopping, however there is no freewheel action. So basically, if you stop and the pedals are in the wrong position it is going to be awkward to get going again. The learning curve, however, is fairly short and most coaster brake users don't have any issues once they adjust. These brakes are most ideal for flat terrain and I certainly recommend having a single hand brake on the front wheel as a backup. The OV Fiets I rode in the Netherlands and the Africa Bike reviewed above both featured coaster brakes.

Hand brakes cover a huge range of mechanical choices - V-brakes, Sidepull, Centerpull, Cantilever, Disc, Roller, and Drum. The first four are all rim brakes that actuate by brake pads clamping down on the rim of the wheel. Mechanically, they vary, but they'll all stop you when they need to. Rim brakes, however, lose a significant amount of stopping power when they get wet, and the mechanics of then can stop working in freezing weather. That being said, I've been riding rim brakes my entire commuting career and with a little extra caution you should be fine.
 |
| Rim Brakes. These are Center-Pulls. |
 |
| The Surly has Cantilever, another style of rim brake. |
The last three in my list up there are pretty much all centered around the hub. Roller and hub brakes are found on many European city bikes and are extremely uncommon in brands commonly found in the USA. Disc brakes are the typical style on mountain bikes, many cyclocross bikes, and high-end commuters. They have a rotor, which is squeezed by brake pads exactly the same as disc brakes on a car. They can be more high maintenance and are less DIY-friendly, but they will stop ANYTHING in ANY weather. Just be careful not to send yourself over the handlebars.
Alright cool. So you want a steel, diamond frame bike with derailleur gearing and rim brakes? You have just narrowed your choices down to a whole style of bike, congratulations!
Ride Position
This one is EXTREME personal preference, but here's the basics. There's a lot of complicated math in the frame geometry design of a bike that determines rider position. But what it all comes out to is where your feet are in relation to the saddle, and the handlebars in relation to the saddle, both horizontally for reach, and vertically for height.
Road and performance bikes typically place your feet pretty vertically under the saddle (the fancy phrase for this is a "Steep seat tube angle"), and the handlebars level or below the saddle by a couple inches. This creates a very powerful, aerodynamic position that can be used to create great speed for both distance and bursts of power. However, bikes with this positioning are usually not very good with any sort of formal clothing - particularly skirts.
On the opposite end of the spectrum are "Upright" or "Dutch" style bikes. On these bikes your feet are well in front of you, and the handlebars are fairly high, which results in a position that's been nicknamed "Sit Up and Beg." You sit bolt upright. These bikes do not usually require specialized cycling clothing for weather beyond what you normally own because the position of the bike doesn't necessitate features like longer sleeves.
In between these two extremes, there is a bike for literally every angle a rider and their back could want. The most important thing is to determine what's most appropriate and comfortable for you as a rider and the best way to do THAT is to test ride a bunch of bikes that are properly measured to your dimensions. Once you've ridden several bikes, you'll have an idea of what you like and can make a decision from there.
Extras
Also called Accessories. The stuff that makes a house a home. For commuters, the biggies are lights, a rack, and fenders, in that order.
Lights
Let me be straightforward - 95% of the bikes available to you do not come with lights. That doesn't mean you should walk out of the store without them. These are an absolutely ESSENTIAL piece of your kit. The 5% of bikes that do come with lights will typically be Dynamo lights, which are powered by the rotation of the wheels rather than batteries. They're totally sweet, but the wheels have to be built around the fact they're there and can be expensive to add if the bike didn't come with them in the first place. Battery powered lights are pretty much the standard in the USA, but there are some really cool ones available (check THIS out).
Rack
This is where you put your stuff. It can be a front rack or a rear rack - either's cool for different reasons! They can have baskets strapped to them, panniers draped over them. In one case, I tied together two re-useable grocery bags and made some homemade panniers on an impromptu shopping trip. You can put a kid seat on a rear rack. Or a friend. You need one.
Fenders
I've carried on about these before. If you ever plan to run through a puddle or get caught in a rainstorm, these are a good idea. Clothing protection is a highly underrated thing and fenders will keep you (and your bike!) clean from road spray. I've even seen rocks come flying out of my fenders that would otherwise have rocketed up into my face - not comfy! Many commuters come with the rack/fender combo and all the buyer needs to add are lights. Lots don't though, and these essentials are aftermarket additions. When looking at the price of a bike, do consider what the price is versus what it might cost to add these things one bit at a time.
More than anything else though - when you ride your bike you should love it. It should be comfortable, and give you a song in your heart. If you get on a bike at the shop and feel a like a big 5 year old on a sunny day, that's the bike.
Tuesday, May 14, 2013
Knowing Where You're Going
Until I went on vacation, it had been a long time since I went anywhere unfamiliar. I mean that - everywhere I've gone is somewhere I'd been before and had a pretty good idea of where I was, and where I was going. I've noticed something weird - when you know where you're going, you don't notice distance quite so much. Let me try to explain what brought this train of thought on.
While I was in the Netherlands we did a bit of a tour of Zuid Holland, cycling from Leiden -> Keukenhof -> Noordwijk -> Leiden, for a total of about 30 miles. I'd post a map of the route we took, but unfortunately my iPad ate it. But to visualize it, here's the Google Maps recommendation for how to get between these places - this isn't how we went, but close enough for the purposes of this post.

The distance between these places ranges between an 30 minutes to an hour worth of cycling at a time. However, as a stranger in the country at no time did I have half a clue where I was - neither in relation to where I'd come from, where I was going, and how far was in between. Just flashing by houses and fields following my friend. Halfway through the day I had completely lost my sense of place.
This lack-of-place makes distances seem SO much further. This was driven home the other day as I was cycling a route that's about 8 miles long to the destination, but familiar as the back of my hands. I don't notice the time spent, even if it's the SAME amount because there is a sense of familiarity all around me - I know how long it will take to get anywhere, in any direction around me. Remove that and even short distances seem interminable. This also seems to apply when in the car or walking, it's not exclusive to cycling.
As someone who tries to do the "think globally, act locally" thing, I guess hadn't realized how "local" you really do become after a while.
Swim, Bike, Run - Ironman Style
This Saturday, I'm throwing my stuff in the car and driving to Houston to see my brother run the Ironman Texas Triathlon, a race where he'll swim 2.4 miles, bike 112 miles, then follow it up with a marathon. While I'm excited to see my brother run, he also is running this race to raise money for the Leukemia & Lymphoma Society.
Our connection to this cancer society goes a little further than a race. Nearly two years ago now, my Uncle Ray (Mark is in all technicality my cousin) was lost to multiple myeloma. This is an incredibly virulent and painful form of blood cancer, and in my Uncle's case, took him from us in 6 short months. In the time since then, I've donated my hair to Locks of Love, walked for the American Cancer Society, and donated blood. To say this is near and dear to my heart is understating things.
We're pretty close to the donation goal, but not quite there yet. So while I'm not usually one to flog things on the internet for this one I'm just gonna go ahead and do that. If you've got an extra $10 burning a hole in your pocket, this would be a great place to put it. The donation page is available here: http://nca.lls.llsevent.org/mwilliams
Monday, May 13, 2013
From Bad to Worse
Something I don't know if I've shared on this blog is that I am really, really injury-prone. If you put a lamp cord somewhere I'm not expecting it, I will trip over it and probably sprain something.
So it came as no surprise that I managed to hurt myself literally by being forced to sit still too long while on the plane to Europe. I hadn't moved on the plane in a while, which put a cramp in my leg, which turned into a giant ball of tightness. Then, when the plane landed, I stood up. This led to a pulled calf muscle right behind my knee, which led to limping and general leg-related suckage my entire trip.
As I got home, my leg had mostly started to clear up on it's own. I've taken it on several 10+ mile rides and been fine. However, earlier this week I went and did some upper-body weight lifting, and have managed to pull a muscle somewhere in my ribcage. Breathing hurts. Sleeping hurts. Coughing, laughing, and eating hurt. So this morning at 4:45 AM when my alarm went off to ride into work a combination of exhaustion from trying to sleep through an inability to breathe deeply and a fear of the hill on the way in got me into my car.
I swear, I'm such a sissy.
Friday, May 10, 2013
Rider On The Storm
My commute this morning was rather dramatic! Despite doom-and-gloom forecasts of thunderstorms, I'm definitely feeling the bike-to-work lately so I shoved my raingear into panniers and away I went.
It turns out one of the real pains of my commute Wednesday wasn't that I'm out of shape (though no matter how in shape I get I remain painfully slow). It turned out I was running about 15 PSI in my tires. Oops. So with newfound air in my tires and protective swishy material around me off into the early morning darkness I pedaled.
About halfway through my ride to work, thunder cracked and lightning flashed, and I felt tiny drops hit my arms. Now just for the uninitiated - in Texas we do not have gentle weather. Rain in particular is unpredictable. Thunder and lightning can predicate huge torrential showers, or nothing at all. In this case, it didn't do much other than sprinkle the entire rest of the ride. But it did give me a spectacular light show the whole way in. That's as much scary as it is impressive.
Despite the ominous conditions, it was actually a really pleasant ride (aside from the whole not-in-biking-shape thing). The last year I hadn't been commuting, mostly due to the time constrictions of puppy-raising. I forgot how much I enjoy being out in a potential storm.
 |
| Office Bike hides from the storm. |
Subscribe to:
Comments (Atom)